

I had some mounting issues initially, but eventually, I was able to install my new speakers.
For the install, I needed the following:
- 10mm socket and ratchet
- Needle nose pliers
- 1 small flat blade screwdriver
- 1 medium sized flat blade screwdriver
- 1 regular sized philips screwdriver (the one I used was magnetic and it helped a little).
- 1 Dremel with cutoff wheel (Yes, you read that right).
- Some speaker wire. Not much, but enough to run from the stock speaker wire location to the crossover and some wire to run from the crossover to the tweeter.
- 3M double sided tape (I had a roll of the stuff in the garage).
- 4 medium-large zip-ties
- 4 small zip-ties
- wire strippers/cutters
- crimper tool
- 4 female blade connector ends
- some shrink tubing
- hair dryer (Or heat gun)
- 4 crimpable wire nut things.
- 4 small flat washers
- 2 small split washers
- 2 small machine screws
- 2 small machine nuts that fit the screws
- some sort of knife or blade
- pliers or wrench that fits the machine nuts.
…. If anything else is needed, I’ll mention it below.
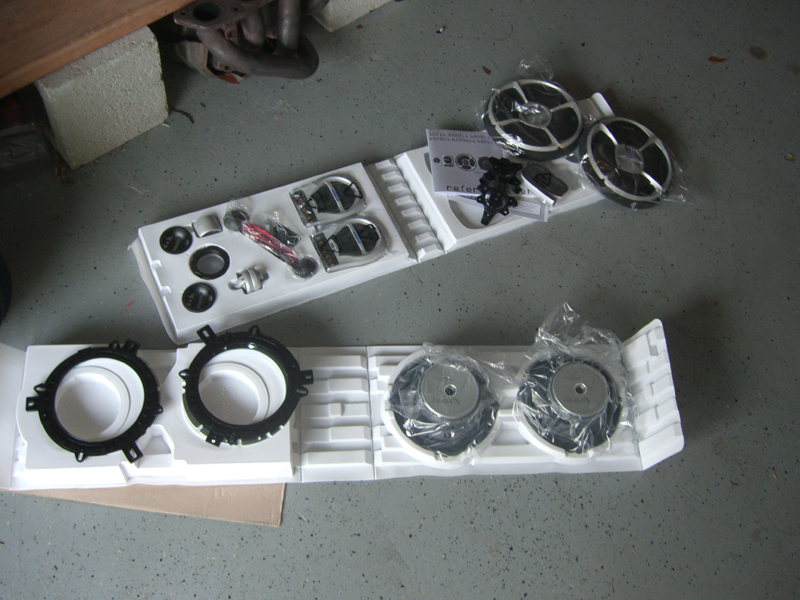
Here’s what I got for $106.00 shipped (eBay). This is what’s in the Infinity Reference 6020cs box:
Here was my resources and entertainment during the install:
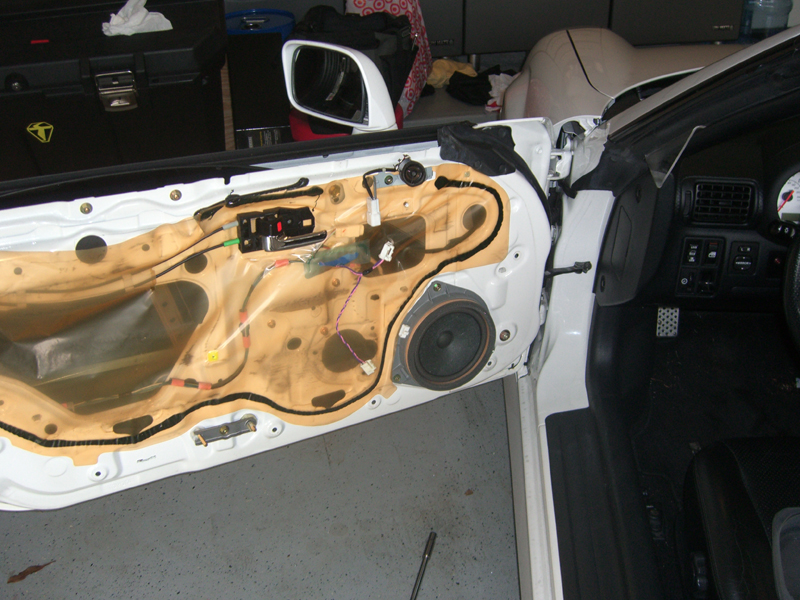
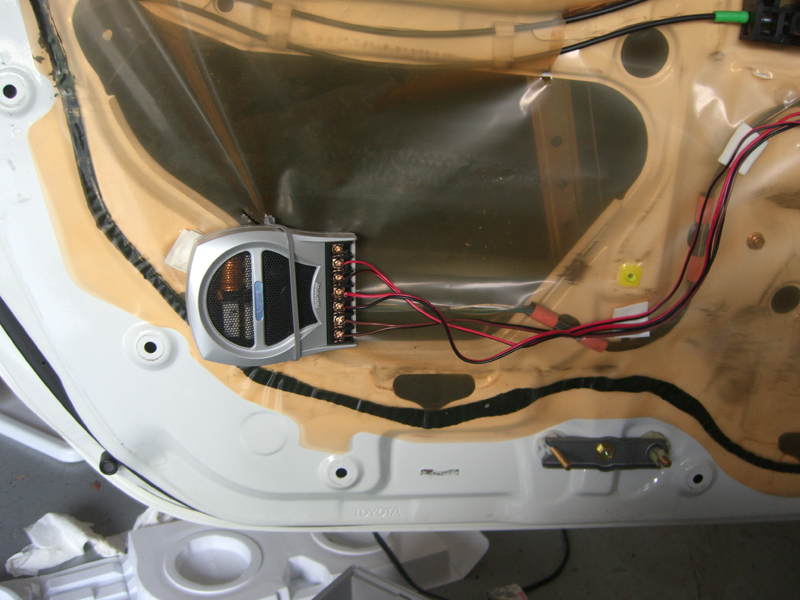
Start out by following the instructions on Spyder Magazine for door panel removal. That is very helpful. Here is what your door should look like after you take the interior panel off:
No comments about my floor being dirty.
disconnect the 2 plugs for the speakers and then remove the bolts holding them on the car. Save them all since you’ll need them to install the new speakers. The stock tweeter has a screw that holds it to the mounting piece. once you get the whole unit off the door, unscrew that and remove it from the mounting bracket. There is some sort of adhesive on there, so you’ll need to use some force with it.
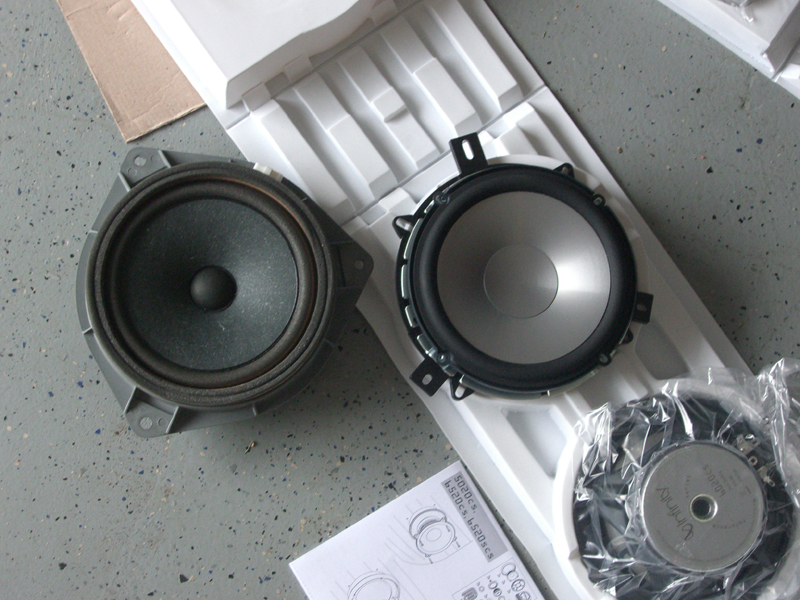
Here’s a comparison pic of the stock vs. Infinity speaker:
OK. That went smooth. …. Almost too smooth…. Well, now comes the *fun* part.
First, run the provided woofer speaker wire to the hole where the speaker will go and have the other end (without the connectors) just sticking out at the area where the stock wires are.
You need to mount the crossover to the door. And there is only 1 place where there’s enough clearance. However, only part of that area is over solid metal. Luckily, there is an existing hole in the metal that you can use for a zip tie. There’s a clip that holds some other wire or door lock cable or something right where you need to put your crossover. So I placed some 3M double sided tape around it and “stacked” it up. This helps for 2 reasons: 1. it holds the unit in place while you’re zip-tie’ing it. 2. It will prevent it from banging around once the install is done. DO NOT put the crossover on the tape yet. leave the plastic cover on the tape while you’re getting your positioning done.
Do some measuring and looking at the back of the door panel to make sure that you’re putting this in the right spot. There is some room for error, but not much. If you look at the picture below, you’ll see that the bottom of the crossover is right in line with the hole for the door panel clip horizontally. And it’s a little way’s forward on the door from it. This is where you will need to mount it.
Now cut a small slit above the unit and then again below in the hole that is right there. Take 2 good sized zip-ties and thread through the slit at the top and pull it out at the hole in the bottom with some needle nose pliers. Now, you’re ready to put the crossover in position. So take the plastic covers off of the tape pieces and place the crossover in position. Then zip-tie it up. It should be really secure without too much force on the zip-tie.
Here it is installed:
If you thought that was a PITA, just wait for this next part….
Now on to the tweeter… You will use the silver tweeter holder piece from the kit, a machine screw and nut and 2 flat washers and a split washer. The screws and bolts and stuff that come with the kit will NOT work for this. And you will need a dremel or other rotary tool. Put the tweeter holder on the mounting bracket and put the screw through with the washers and nuts in the following order on the back coming from the bracket:
1. Flat washer
2. Split washer
3. Flat washer
4. Nut
Tighten everything and make sure the holder is in the position pictured below. Then, break out the dremel and a cutoff disc. cut off all remaining length of the machine screw right down to the nut. Then, go back and fourth to grind down the machine screw head so that it is flush with the plastic tweeter holder. none of it can be higher than the plastic bottom. Once it’s all good, blow out the dust. I used my air compressor and an air chuck. If you don’t have those fancy things, you can just use your mouth.
Here is the bracket and holder in the correct position and ground down:
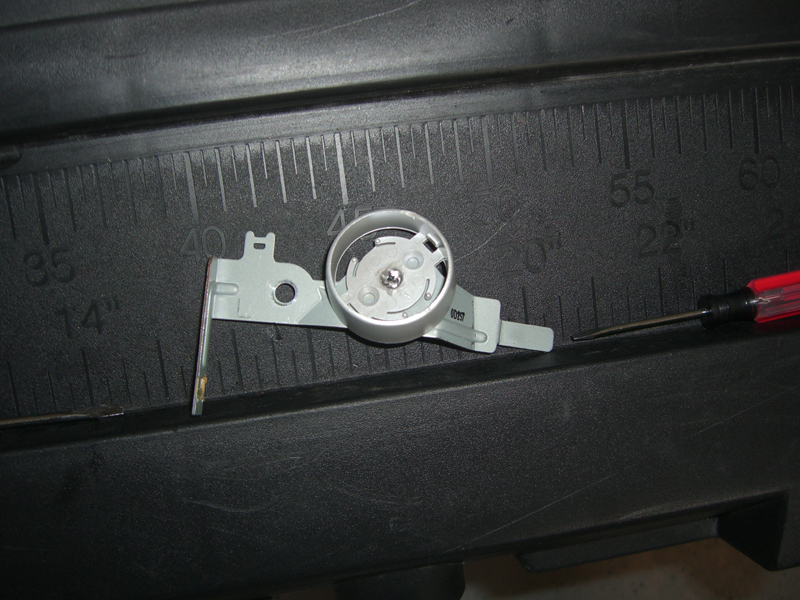
(Note the position of the tweeter holder. this is necessary to fish the wires through).
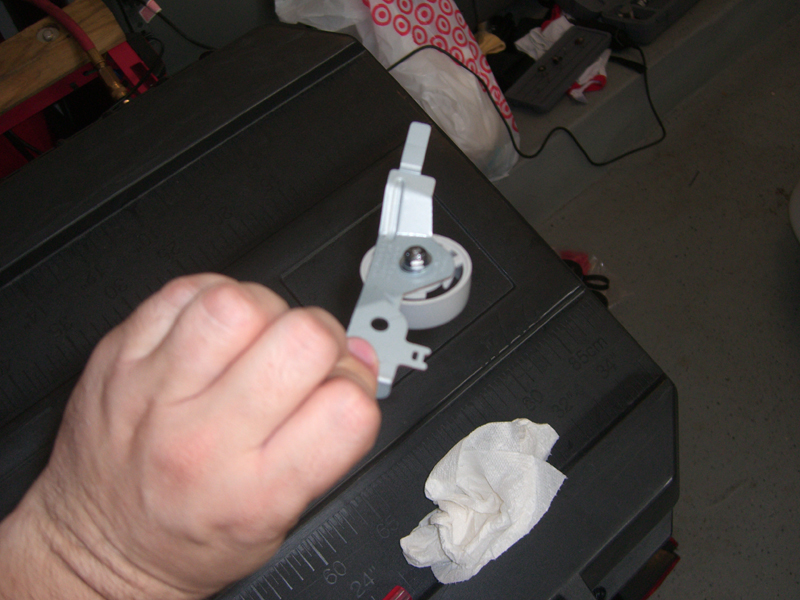
Here’s the back of the mount. You can see that I ground down the remaining piece of the screw.
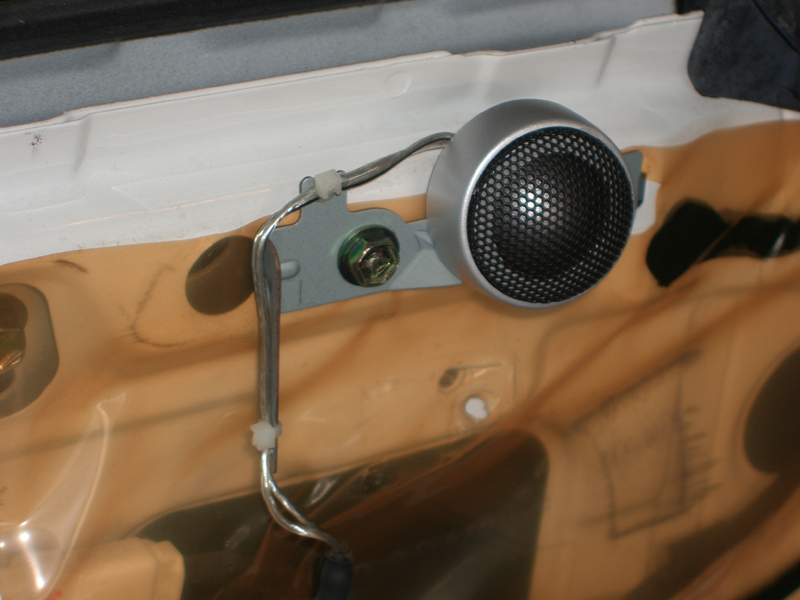
Thread the wires through the only place they can go and put the tweeter in place. it locks in by pushing down and twisting. This is not that easy either. But once done, zip-tie the wires to the bracket as shown in my installed pic below. Put the whole assembly back on the door and secure with the stock bolt.
Here’s a pic of the tweeter installed:
As for mounting the main woofer, my method was not that great. You should probably consult someone who knows more about speaker installation than me. But I was able to get them mounted securely with the provided brackets from the Infinity kit and some washers and more double sided tape. I used the plastic mounting ring and I put double sided tape at all of the tab areas except for the long tab. before putting the tape on, check to make sure you know where you’re putting everything. I bolted the long tab to the forward lower hole in the door. I then used washers and the other stock bolts to secure the other 2 locations. They are in a way that will prevent the speaker from orbiting and the double sided tape provides cushion and more insurance that the speaker will not move.
I have no picture of this, but I think other people will do a better job than I did.
Now wire up the speakers to the crossover. As you can see from the crossover installed pic above, I used more double sided tape to help guide the wires. IT is very self explanatory about which wire goes to what on the new speakers and crossover. The stock wires are not as obvious to those that don’t have the info right there. So here you go, ya lazy bastitches… Driver’s side: Pink +, Purple -. Passenger side: Green +, Blue -. connect your wire to the crossover and run it to the location of the stock wires. Cut the stock harness so the 2 plugs that go to the stock speakers are no longer there. Strip and put the wires together with the wires going to the crossover. You can be all fancy and solder these and shrink tube, or you can do what I did and use the crimp-able wire nut things.
Run the provided wires from the woofers to the crossover (This should have been done BEFORE you mounted the woofer). Then run some wire up to the tweeters and crimp some female blade ends on them so that you can plug the tweeter into it (the small one is negative). Put some shrink tubing over this connection to prevent shorting. Hit it with the hair dryer and you’re done.
Now move on to the other door and repeat.
Once it’s all wired up, check out the new sound. If it all works, then put the door panels back on. Now that you’ve taken them off, putting them back on will be real easy.
Now go driving and be pleasantly surprised with the better sound that nobody will ever know is there unless you tell them.
I hope this helps.
Now here’s my impressions…
The thing that I really like about this is that the door still looks completely stock with all of the stock speaker grates and all that. For you ricey types that absolutely MUST show you’ve got Infinity speakers, there was a sticker in the box.
When I first checked them out, I could barely tell a difference. I had just spend HOURS on this damn install and that was it?! I was not happy. But, I figured I’d give it time since I was really tired and had to do some other stuff that day. So, on my way to work today, I gave it another go. There is DEFINITELY an improvement, especially with the tweeters! I’m hearing sounds in the songs that I previously did not. It is a definite improvement. This is comparing windows and top UP driving. with everything down, I don’t know how much better they will sound, but they can’t sound any worse, right?
Anyway, if it didn’t take me so long to figure out how to mount the pieces, I would have been done in an hour or so. Hopefully this information will help someone else out and they’ll feel obligated to buy an antenna or something. hahaha. I’m glad I put them in and the price was right for me at $106.00 shipped. There is an improvement and everything looks like it did before.