Even Yet Still More Updates

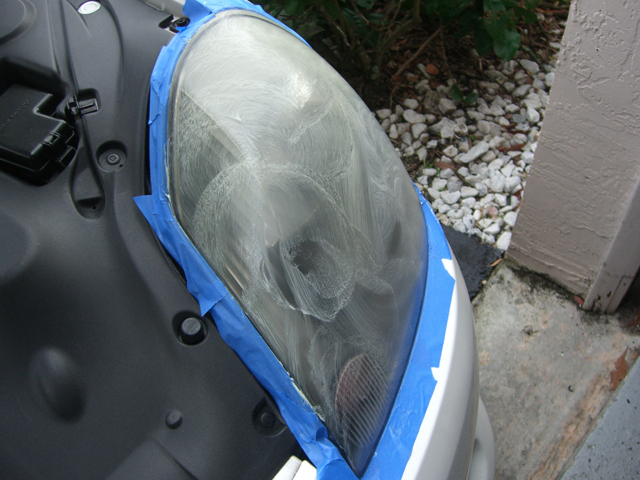
The engine project is moving along slowly.  But is still making progress.  The main thing that remains is getting various parts ordered and ready / installed so that when the time comes to pull the old engine out, the amount of time that the garage stays in ER mode.  Also, on the list of things to change will be the heat exchanger in the front and re-routing some hose.

While the engine is out, I’m going to try to paint the engine bay and clean it up a lot.  I’d like to find a ported oil filter sandwich plate to mount my temp sensor there instead of right next to where the return line from the turbo enters the oil pan.  But I haven’t seen any good options.  If anyone has any suggestions, please post a comment.

More stuff to come later and hopefully with pictures.

Read More

Updates are coming

I am in the process of restoring all old historical posts and plan on adding some new ones revolving around the new engine progress to get a bit of a mix of both.  Since the MR2 is no longer my daily driver, the mod progress has slowed quite a bit and I’m making sure I take time to do things right and think them completely through before acting on the impulse.  That might not sound as fun as winging it, but it’s the best option.


Be on the lookout for a post that will sort of bring the progress up to the current state.  I don’t have a ton of pics for everything, but there should be enough to go with all the info for it to be entertaining.


Thanks for reading.

Read More

Finally Inter-Cooled!!!

A few of you may know how long I’ve been planning and waiting for all of the pieces to come in to finally add an Air-to-Water Intercooler to my setup. Well, that wait is FINALLY over! It was a combined effort to acquire all of the components. I got most of the system from Web 3.0 a little over a year ago. It was essentially the inter-cooler kit (minus the actual inter-cooler) for his super charger setup. Then came the inter-cooler itself. I got that from KingSpyder. It’s a PWR barrel cooler with piping that happened to match up perfectly to my Power Enterprise Turbo setup. And I bought a few odds and ends at the hardware and auto part’s stores as well as onlin to complete the whole package. That included things like hose clamps and bendy things and an HKS SSQV BOV.

Most of the waiting was ...

Read More

Engine Hangers

JapanParts was selling an engine a little while back.

Some people asked about the hangers pictured in it. Tem mentioned that they remove those when the engine is installed and that they were about $5.00 at the dealer. Well, I was looking up some part numbers for other misc fasteners and such and I decided to grab those part numbers in case anyone was interested. I’ve listed the MSRP of the parts, but you can likely get them cheaper depending on your local dealer.

There are 2 hangers. the No. 1 hanger was changed for the Dec, 2002 and up production date. I have no idea what the difference is, but it is a different part number. These were gotten from my microfiche printouts and the prices were gotten from doing a part lookup at the dealer.

No. 1
00-02 = 12281-15040 -> MSRP: $7.66
03-05 = 122...

Read More

Infinity Reference 6020cs

I had some mounting issues initially, but eventually, I was able to install my new speakers.
For the install, I needed the following:

  • 10mm socket and ratchet
  • Needle nose pliers
  • 1 small flat blade screwdriver
  • 1 medium sized flat blade screwdriver
  • 1 regular sized philips screwdriver (the one I used was magnetic and it helped a little).
  • 1 Dremel with cutoff wheel (Yes, you read that right).
  • Some speaker wire. Not much, but enough to run from the stock speaker wire location to the crossover and some wire to run from the crossover to the tweeter.
  • 3M double sided tape (I had a roll of the stuff in the garage).
  • 4 medium-large zip-ties
  • 4 small zip-ties
  • wire strippers/cutters
  • crimper tool
  • 4 female blade connector ends
  • some shrink tubing
  • hair dryer (Or heat gun)
  • 4 crimpable wire nut things.
  • 4 small...
Read More

2008 Florida Spring Fling Pics

Here’s some pics that I took yesterday at the meet. We ended up with a total of 6 MR2 Spyders in the show and Optimus Prime was there also, but not in the lot. So I guess you could say we had 7.

The day started out pretty slow with people showing up. gromit659 and I were the first to arrive. Followed by another owner from Melbourne. He said that he’s not on this forum though (Only uses MySpace).


Me (LordTakuban) = White
gromit659 = silver
Melbourne dude = black-ish with custom paint

Then russle and Spyderpez showed up (In that order). It was the first time I’d seen spyderpez with an actual spyder and not a subaru.   And I actually met Russle before he even bought his spyder at a Dyno Day event for an SR20 forum...

Read More

Lookie what I made ( CF Nose Badge )

So I smashed up my old CF Nose badge that I got from Hong (Pelican Racing) at an autocross event. And I was in need of a replacement, FAST. To solve my dilemma, I talked to m&m1951 about the possibilities of making a CF nose badge. … Now I already bought a black custom nose badge a while back to have as a backup in case anything ever happened. That is still my backup. … So back to the story. m&m1951 said he would sell me a cleaned and prepped badge and I could try to do the CF part myself. And if I was successful, I would be allowed to market the CF badges to the public. So it’s really a joint venture.

I’m using real carbon fiber in the good, JDM, 1×1 weave (None of that cheap-ass eBay crap. I tried that out and wasted a bit of money in my development).

So here’s the final product...

Read More

Meguires Plastx

I’ve been meaning to try this stuff out for a while on my head lights. I just never got around to picking any up. Then my Brother-in-law got some and did his headlights. So he hooked me up with the stuff and I just finished using it on my headlights. The overall process is pretty easy. it’s *kind of* like a wax. Only you don’t need to wait for it to dry to buff it off. I still let it sit for a little while just because I thought it might give better results. I’m not sure if that was necessary. Also, I taped off the surrounding area so I wouldn’t get any of the stuff on the paint of rubber.

Here’s all the stuff that’s needed to use the product:

Here’s a before shot of my left headlight:

Here, is after I applied the PlastX to the headlight with the applicator pad:

And here’s after I buffe...

Read More

Hass 380-410 Injector Flow Test Results

I bought the Hass 380-410 injectors from Web 3.0 a little while ago and decided to get them cleaned and flow tested after it was suggested to me by aaronjb.

It’s a good thing I had them tested too. I wouldn’t have had the right sizing to factor into my PFC if I didn’t. Here’s the results:

Before Cleaning:
335, 335, 335, 342

After Cleaning:
340, 340, 345, 345

test pressure was 43.5psi
performed at 0.775 specific gravity at 5000rpm with 6.0ms pulse width.

I don’t blame Web 3.0. I’m sure that’s how the injectors were sold to him with a the hass kit or whatever and he was just passing the info along. That’s my assumption anyway.

My reason for posting this is to caution anyone doing any specific tuning with these injectors and sizing them in a PFC...

Read More